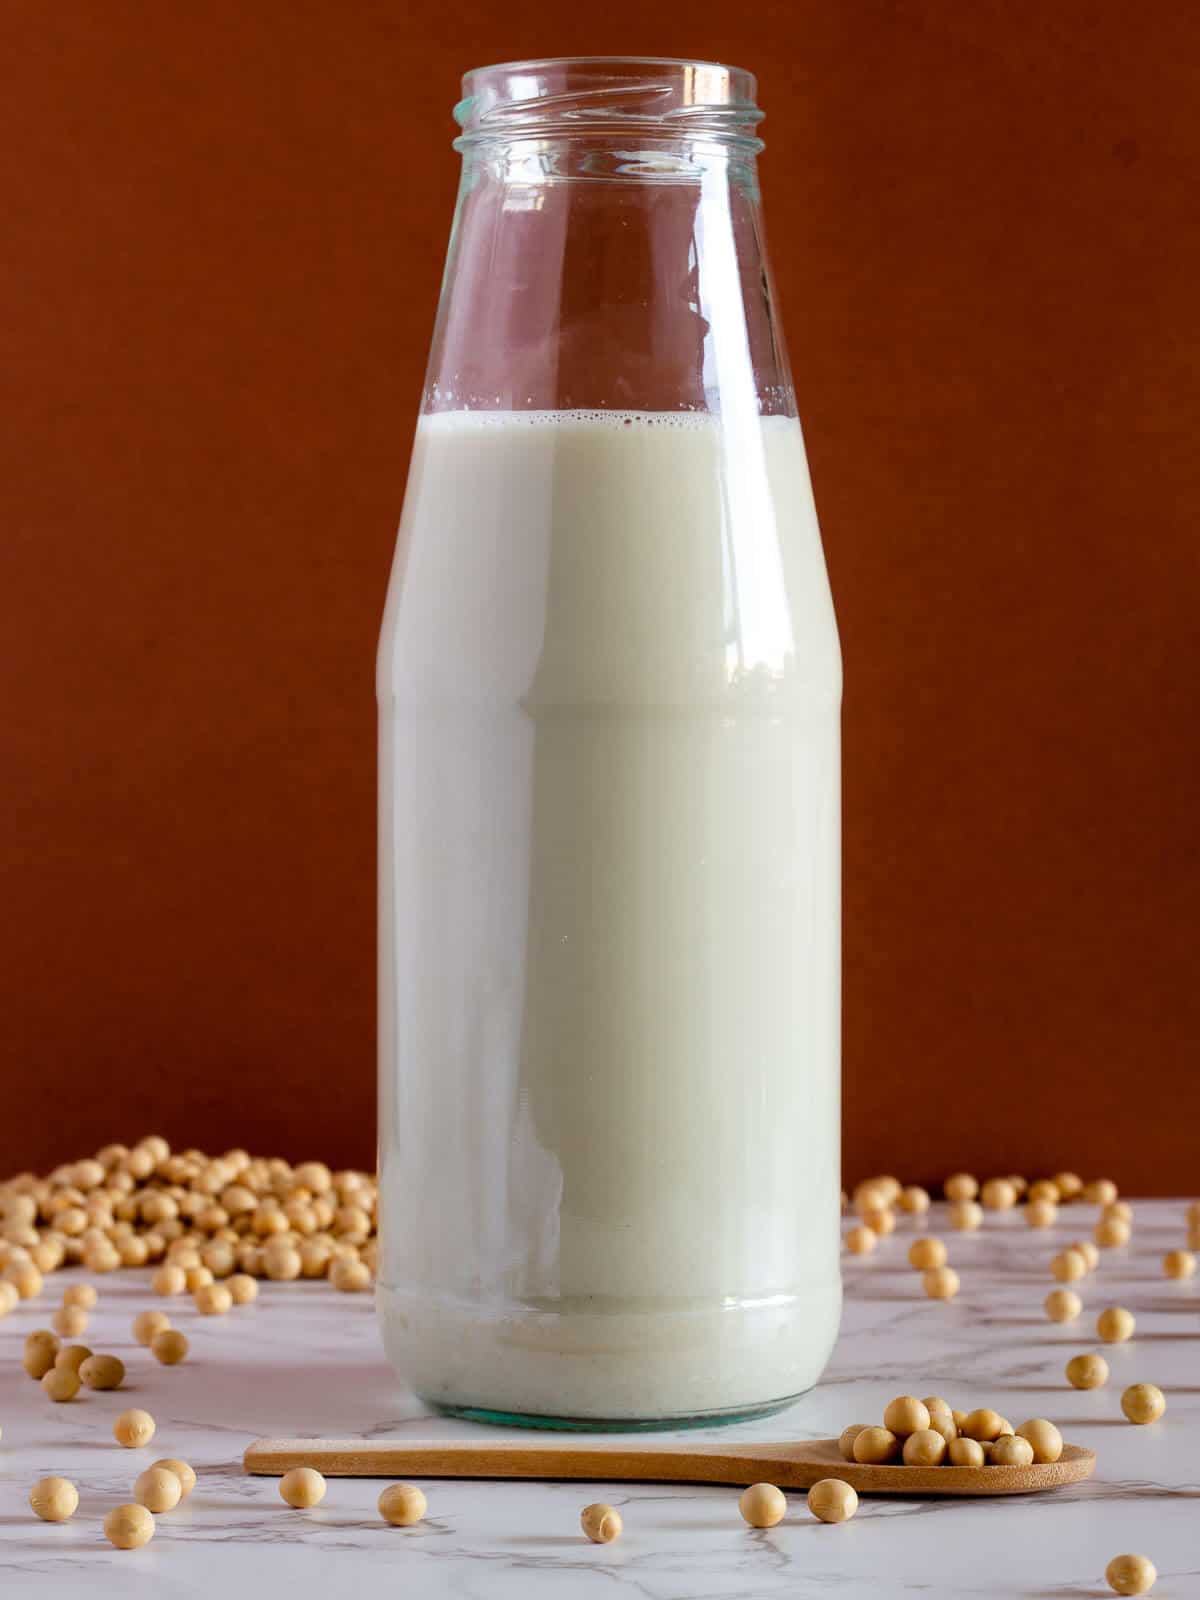
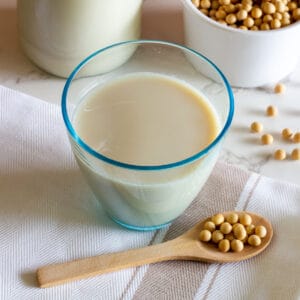
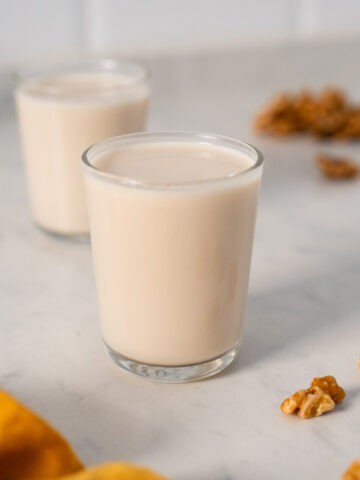
Homemade soy milk is excellent high-protein plant milk. Organic soy milk became our milk of choice for our morning coffee with hot milk, no more to say. Making soy milk is easy and cheap and ensures you have a non-GMO product.
We like that this recipe is super adjustable. You can make it creamier, sweet, or flavor-infused.
You can also make it plain if you need it and use it as a base to make another soy food. to make a vegan bechamel sauce and vegan mashed sweet potatoes.
In combination with olive oil, it makes a delicious vegan ricotta cheese, and it is the best milk to make vegan buttermilk, ideal for vegan baking, given its high-protein content.
It is way cheaper than store-bought and super easy to make. It requires 2 ingredients, 30 minutes, a filter of any kind, and a blender.
Jump to:
🧐 Why should you do your own
1. Health reasons
Commercial soy milk often comes loaded with additives like guar gum and lecithin. Opting for your own mixture using organic, non-GMO soybeans not only provides tranquility but also ensures you're nourishing your body with high-quality, plant-based protein that's easily digestible, free from saturated fats and casein found in whole milk, which some studies suggest may encourage the growth of prostate cancer cells.
Plus, soy milk typically has fewer calories than dairy, aligning well with weight management goals.
2. Convenience
Homemade soy milk is a cinch to prepare, taking just 30 minutes from start to finish. You have the freedom to produce exactly the amount you need, customized to your taste preference for flavor, thickness, and sweetness.
3. Budget-friendly
Making soy milk at home is economical—you save by using simple, low-cost ingredients and by buying in bulk. You also avoid the added expense of packaged flavors and can tailor the quantity to prevent waste, ensuring your pennies are well spent for every batch you brew.
It’s a straightforward, thrifty choice that benefits your budget and the planet.
4. Sustainability
Homemade soy milk is a win for sustainability. By making it at home, you're reducing packaging waste and the energy spent on processing and transportation that comes with store-bought options.
Plus, choosing organic, non-GMO soybeans supports eco-friendly farming practices. This DIY approach minimizes your carbon footprint, making every sip a toast to the Earth's health.
🧾 Ingredients
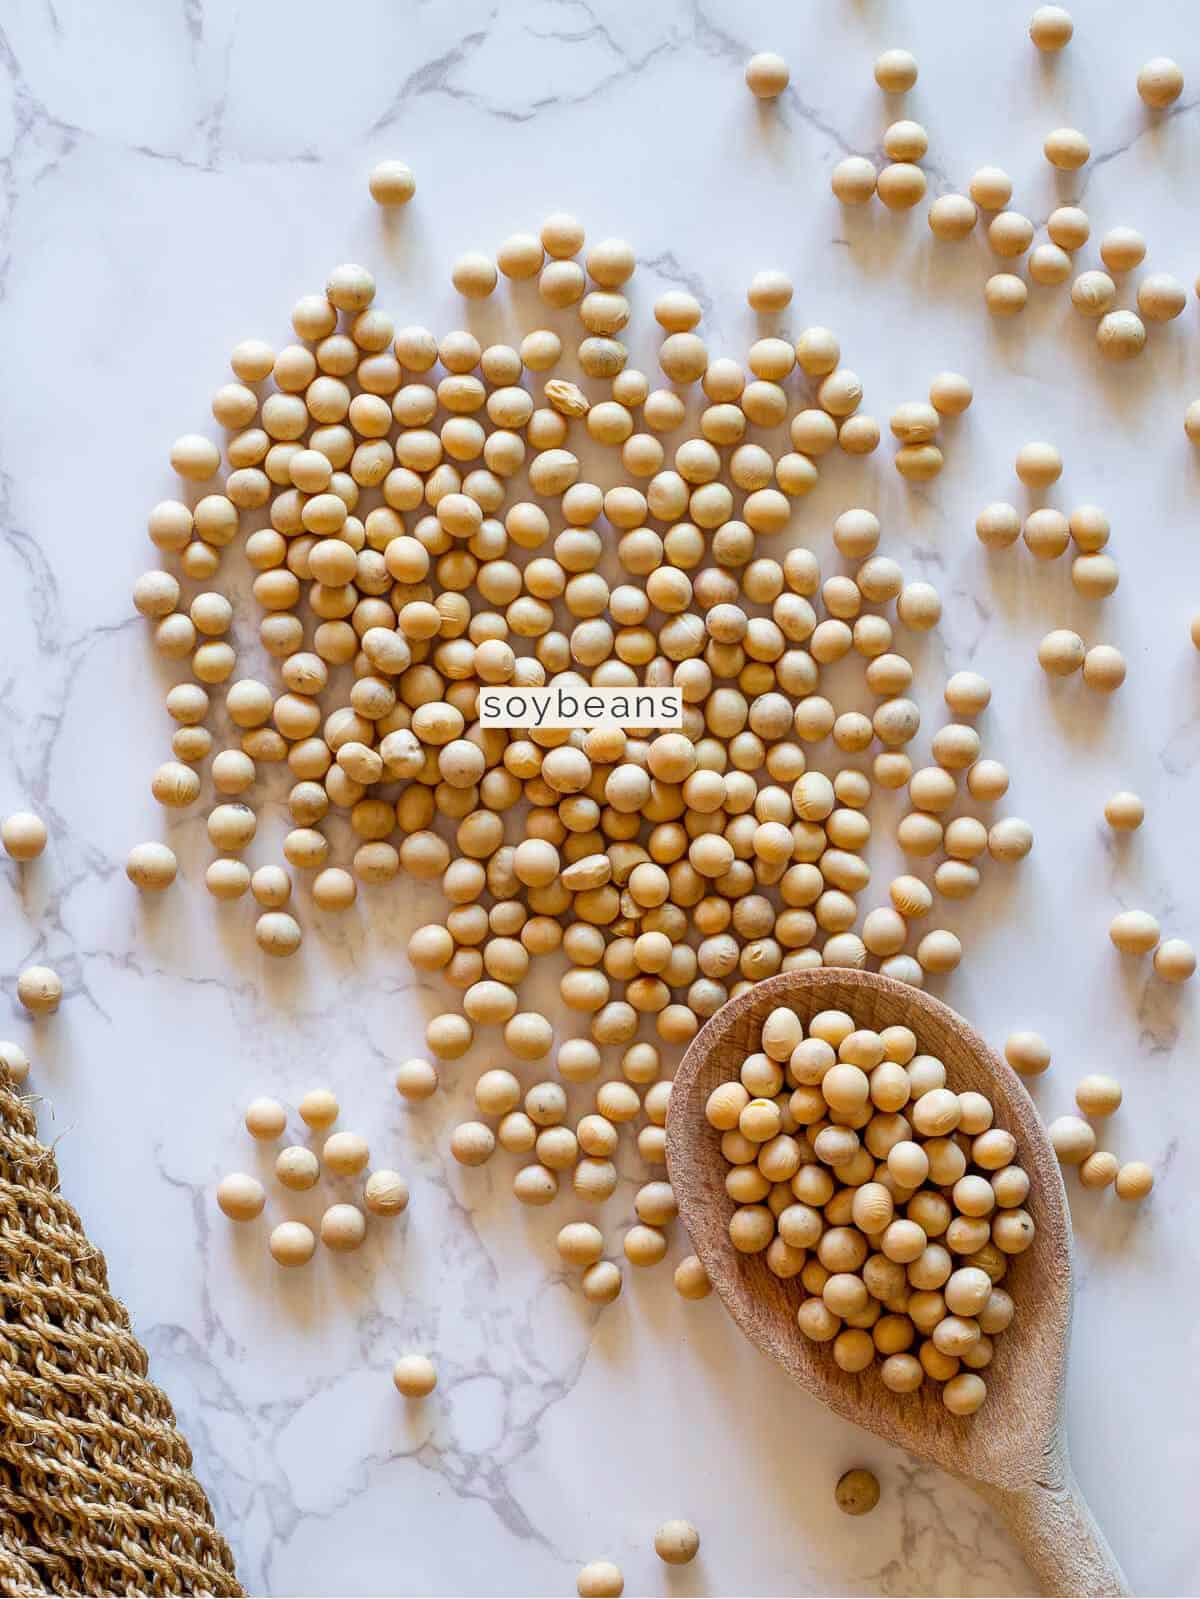
- Dried soybeans
- Filtered water
Optional
- Sweeteners like Medjool dates
- Flavor enhancers like almond or vanilla extract
- Sea salt
Hint: keep your milk unsweetened if you plan to make vegan buttermilk with it and use it in baking.
🍽️ Equipment
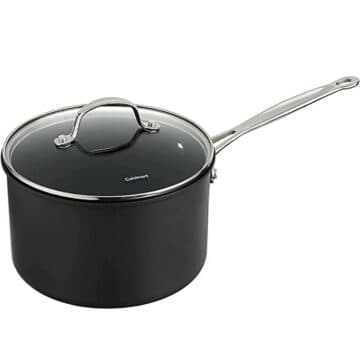
- Large saucepan
- Saucepan
- Nut milk
- Strainer
- Flat hand skimmer
🔪 Instructions
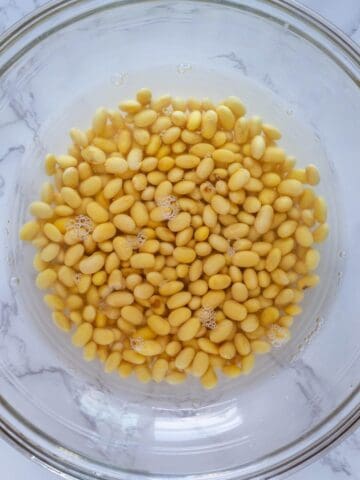
Step 1. Soak & Drain: Start by soaking non-GMO soybeans in water overnight. Drain them afterward.
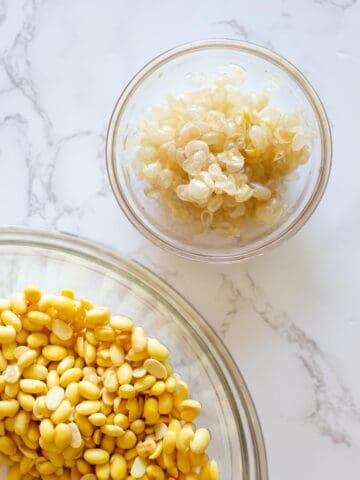
Optional: Some people remove the outer skin; I have done it countless times and can't notice any critical difference in texture. If you choose to do it, plan for an additional 20 minutes.
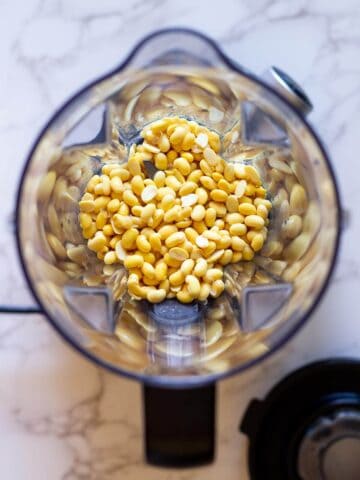

Step 2. Blend & Season: Transfer the soaked soybeans to a blender or food processor. Add fresh water and blend for 1 to 2 minutes.
This is your moment to jazz it up with your chosen flavors. Sweeten the deal with a touch of your favorite sweetener, a dash of sea salt, or a hint of vanilla essence for that extra oomph.
Flavor possibilities: Think chocolatey notes with cocoa powder, a vanilla whisper, a caffeine kick with coffee, a berry burst with strawberries or a nutty undertone with hazelnuts.
Crafting your dairy-free milk means waving goodbye to unwanted sugars. For natural sweetness, now's the time to blend in those pitted dates or a dollop of homemade date paste.
Preferred sweeteners: Consider naturally sweet dates, homemade date paste, plump raisins, smooth agave syrup, stevia, erythritol, or rich maple syrup.
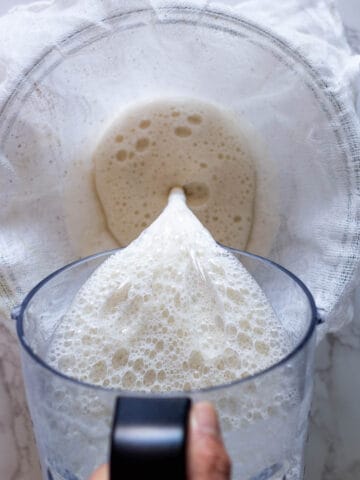
Step 3. Blend & Strain: Whizz the ingredients in your blender until they reach a creamy consistency, which might take one to two minutes, depending on your blender's power.
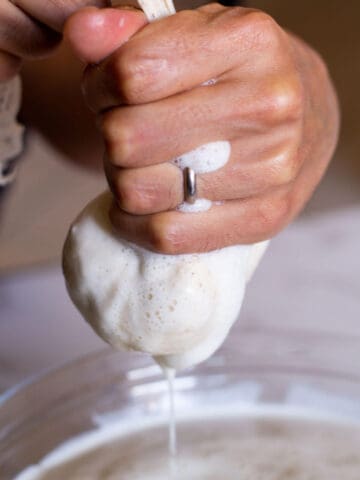
After blending, pour the mixture through a nut milk bag or a fine-mesh sieve lined with cheesecloth. Use your hands to press and extract every last bit of liquid.
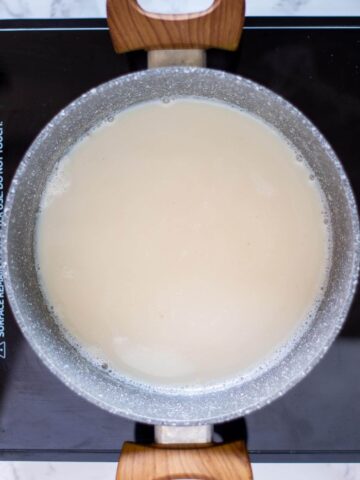
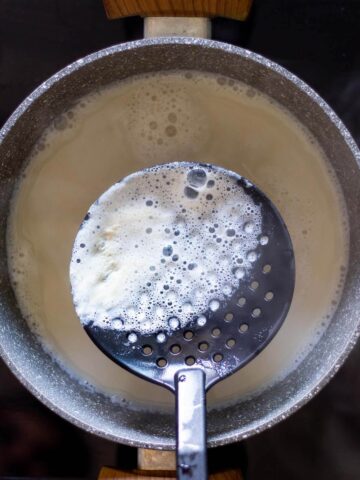
Step 4. Boil, Simmer, & Skim: Transfer the blend to a larger pot, stir in 2 cups of filtered water, and heat it up to a boil over medium-high. Once boiling, reduce the heat to low immediately.
During cooking, remember to give the mixture a gentle stir now and then and use a skimmer to remove any foam that forms on the surface.
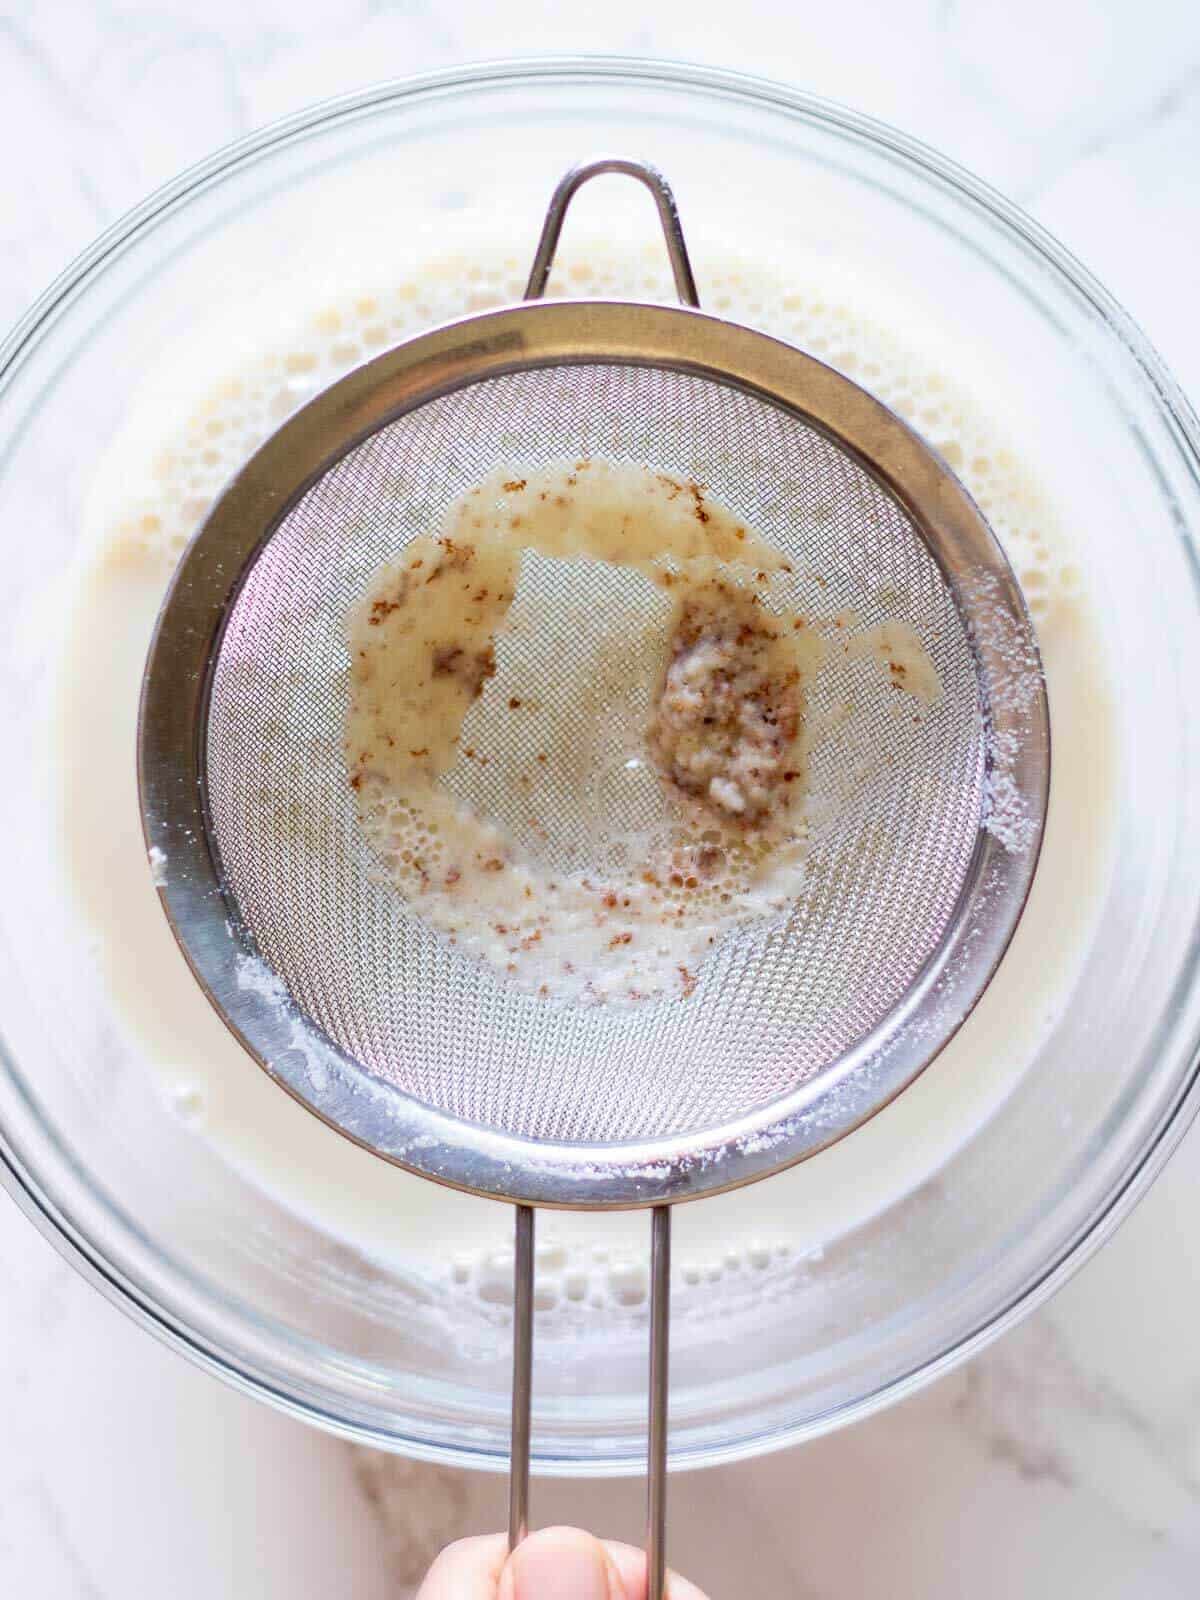
Step 5. Cool & Strain: Allow the mixture to cool down. If necessary, strain it through a wire colander.
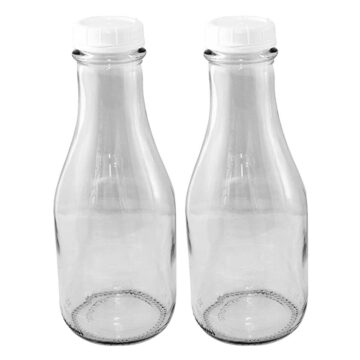
Step 6: Transfer it into sealed bottles. Store it in a sealed container in the fridge for about 3-4 days. See more details below to extend soy milk's shelf-life.
💡 Expert Tips
Exploring Soy Milk Preparation: Chinese vs. Japanese Methods
In the world of homemade soy milk, there's more than one way to create this delightful plant-based drink. Based on our exploration of the two methods here are our findings and recommendations.
Chinese Method: Blend, Strain, Then Cook
This method is widely used and loved for its simplicity and efficiency.
- Soak Your Beans: Start by soaking your soybeans overnight. This softens them and makes them easier to blend.
- Blend with Water: After soaking, blend the beans with fresh water. The ratio is typically 1:3 (soybeans to water).
- Strain the Mixture: Use a nut milk bag or a fine-mesh strainer to separate the pulp (okara) from the soy milk. This step is crucial for a smooth texture.
- Cook the Soy Milk: Pour the strained milk into a pot and bring it to a boil. Then, let it simmer for about 20 minutes, stirring occasionally. This step is important for both safety and flavor.
- Flavor as Desired: Once cooked, you can add sweeteners or flavorings like vanilla or dates.
- Cool and Store: Let the milk cool before storing it in the fridge. Homemade soy milk typically lasts 3-4 days.
Japanese Method: Cook, Then Blend, and Strain
An alternative method involves cooking the beans before blending. This approach is less common but has its own set of advantages.
- Soak Your Beans: Like the traditional method, start by soaking your soybeans overnight.
- Cook the Beans: Instead of blending them raw, cook the soaked beans first. You can use a pressure cooker or a regular pot. Cooking time varies, but a pressure cooker like Instant Pot can do it in about 40 minutes.
- Blend the Cooked Beans: Once the beans are cooked and cooled, blend them with water. The texture might be creamier than the traditional method.
- Strain if Needed: Depending on your preference for texture, you might still want to strain the mixture, though it's often less necessary with this method.
- Flavor as Desired: Add your preferred sweeteners or flavorings.
- Cool and Store: Allow the milk to cool before refrigerating.
Comparing the Methods
- Flavor: The innovative method often yields a milder, sweeter taste compared to the traditional method.
- Texture: Cooking the beans first can result in a creamier texture.
- Nutrient Retention: Cooking the beans before blending might preserve more nutrients.
- Time and Convenience: The traditional method is generally quicker, but the innovative method can be more hands-off, especially with a pressure cooker.
In conclusion, both methods have their unique benefits. The Chinese method (used for the step-by-step on this recipe) is quick and straightforward, while the Japanese method offers a different flavor profile and texture, takes longer, but an instant pot can help.
Why not try both and see which one becomes your go-to for homemade soy milk? Let us know in the comment section of this post.
🫙 Storage
Wondering how long does soy milk last?
The lifespan of homemade soy milk can hinge on your equipment's cleanliness and the ingredients' freshness. Typically, it stays good for about 3 to 4 days.
We're big fans of incorporating soy milk into our morning smoothies, or lemon blueberry overnight oats, and coffee.
Consequently, we usually finish a batch within three days.
If you use lots of soy milk, you can skip the sterilization step, as the milk generally remains fresh until the third day without issue.
Should you notice your soy milk spoiling sooner than expected, here's a quick fix to sterilize your containers:
Begin by pouring hot water into the jars, ensuring they're not cold to prevent cracking.
Follow up with a cycle in the dishwasher for a thorough cleanse.
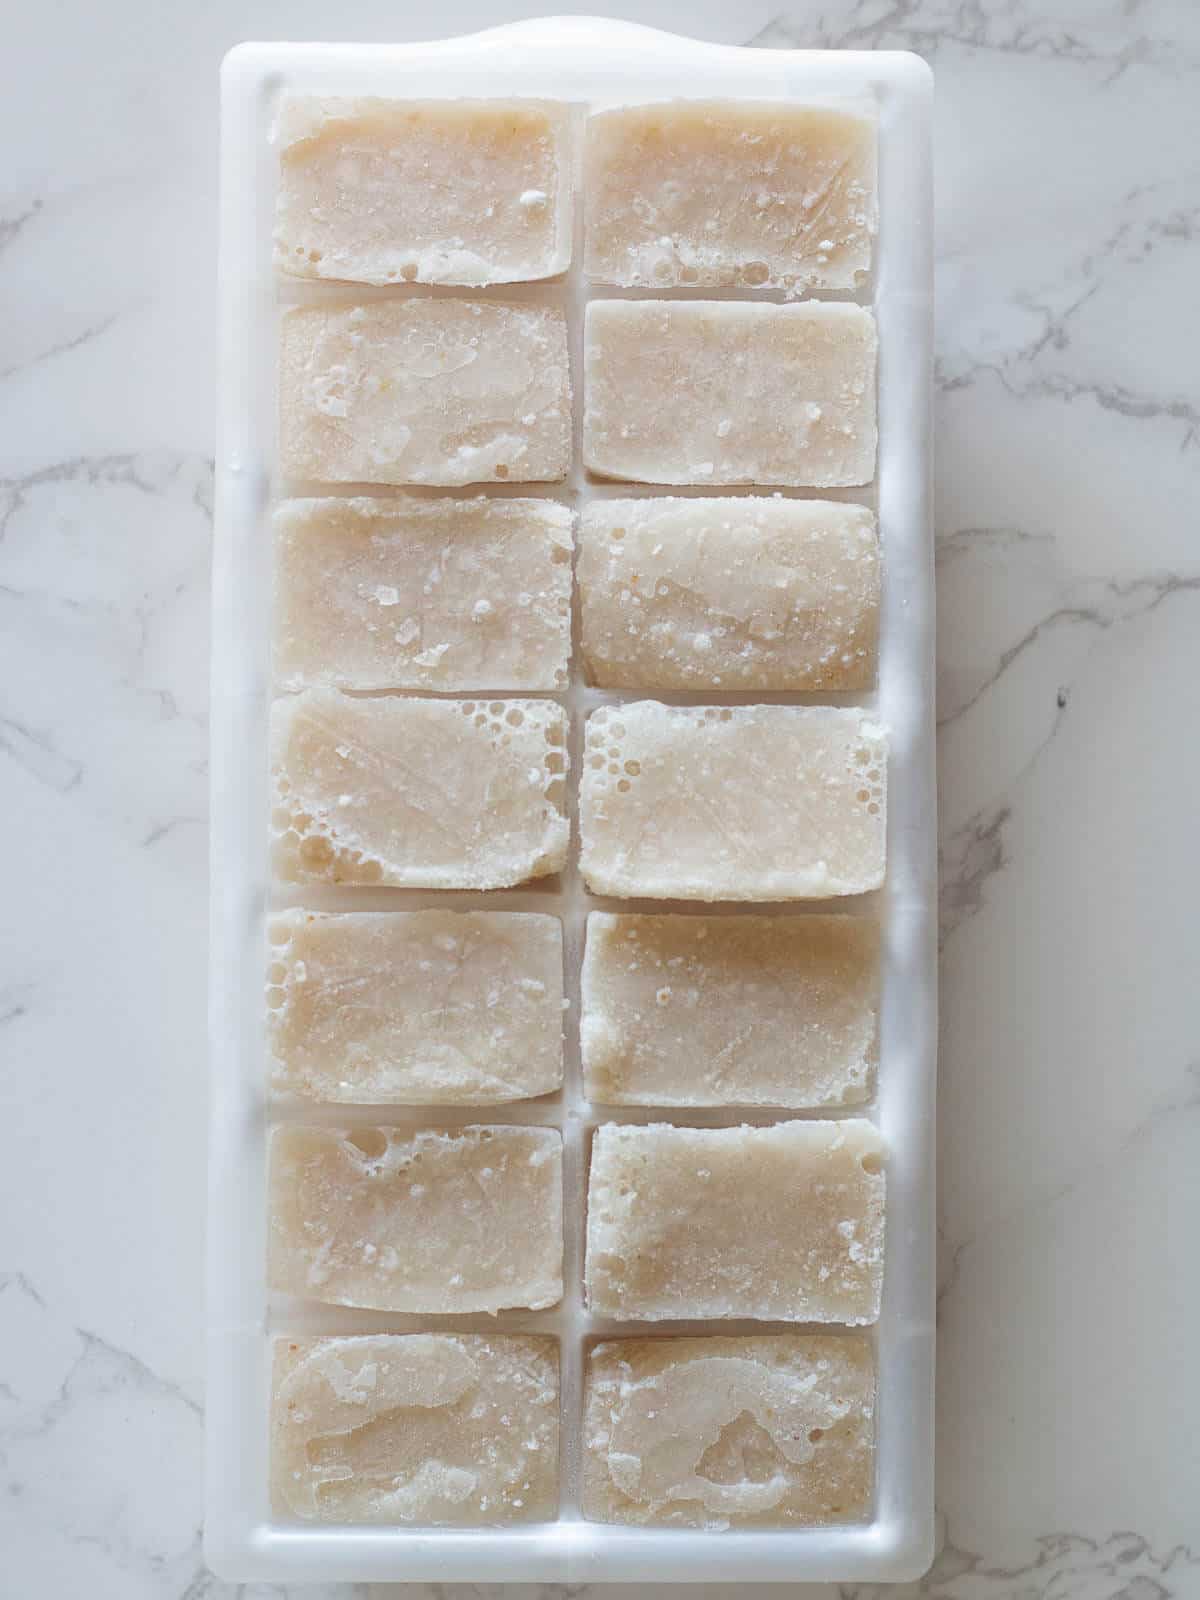
And when you've got excess milk or need to dash out unexpectedly, there's a nifty trick: freeze the soy milk in ice cube trays. These frozen cubes are perfect for tossing into your smoothies later, ensuring no drop goes to waste! In fact soy milk is one of the best milk for smoothies given its high protein content.
❓ FAQ
Soak the soybeans at room temperature or in the fridge.
If you need to make the soy milk the same day, pour boiling water into the soybeans to accelerate the process and leave them soaking for one to two hours.
Crafting the ideal soy milk often comes down to achieving a sumptuous thickness, something that's not quite as pronounced in other plant milks like rice or light coconut milk. Oat milk comes close, but there's something special about soy.
For a richness that hits the spot, we've landed on a golden ratio: 1 cup of soybeans to 6 cups of water, plus an additional 2 cups during the boiling stage.
Looking for a thicker sip? Here are a couple of tweaks you can try:
Go with 1 cup of beans to 5 cups of water, plus 2 when boiling, if you're okay with a smaller yield.
Or, pump up the beans to 1 ¼ cups and use 6 cups of water, plus 3 when boiling, to maintain the same amount but with a creamier texture.
On the flip side, if you're after a lighter consistency or a larger batch, simply dial back the beans to ¾ cup or up the water by a cup.
Not a fan of soy milk's unadorned taste? Chances are, if you're anything like us, you've been reaching for the supermarket shelves' flavored varieties. These store-bought options often come with a subtle mix of additives—vanilla extract and sweeteners being the most common, though they're not always clearly listed on the label.
The fix is simple: Stir in a dash of organic vanilla extract and a sweetener of your choice. You'll be surprised at how it elevates the taste, making it just as delightful—if not more so—than the pre-flavored versions.
And why stop there? Feel free to experiment with other taste enhancers such as cinnamon, pumpkin spice mix, or cocoa powder. It's time to get inventive with your soy milk!
See how to make vegan chocolate milk?
The lifespan of homemade soy milk can hinge on the cleanliness of your equipment and the freshness of your ingredients. Typically, we've noticed it stays good for about 3 to 4 days.
We're big fans of incorporating soy milk into our morning smoothies, overnight oats, and coffee. Consequently, we usually finish a batch within three days.
If you use lots of soy milk, you can skip the sterilization step, as the milk generally remains fresh until the third day without issue.
Should you notice your soy milk spoiling sooner than expected, here's a quick fix to sterilize your containers:
Begin by pouring hot water into the jars, ensuring they're not cold to prevent cracking.
Follow up with a cycle in the dishwasher for a thorough cleanse.
And when you've got excess milk or need to dash out unexpectedly, there's a nifty trick: freeze the soy milk in ice cube trays. These frozen cubes are perfect for tossing into your smoothies later on, ensuring not a drop goes to waste!
Absolutely, you can cook with soy milk! Treat it just like you would traditional whole cow's milk in your culinary adventures – it's a full-on swap.
Just a little heads-up: when you're prepping for savory dishes, keep your soy milk unadorned. Skip any sweeteners or flavor enhancers to maintain the versatility of your plant-based milk.
Some people experience bloating or flatulence when they drink soy milk. This is because the body lacks the enzymes to digest soy.
Soy should be soaked in water for at least 6 hours before it's consumed to break down sugars that are difficult to digest, thus reducing gas and bloating in sensitive individuals.

📚 Recipes that use Soy Milk
You can use it the same way you would dairy milk, but without the saturated fat and vegetable protein!
This is our plant milk of choice to make low-protein dishes like our 4-ingredient potato soup, to raise its protein content.
Consume soy milk in your coffee, in smoothies, in your homemade granola or breakfast fruit bowl, vegan bechamel sauce, baking, and even making vegan ricotta cheese.
Below are some sweet and savory recipes where you could use your soy milk:
- Vegan mashed potatoes for their creamy texture and balancing the protein ratio on this carb-heavy side dish.
- Vegan Cauliflower Wings, soy milk is the perfect liquid yet creamy medium for the batter.
- Creamy Vegan Sauce for Everything to add creaminess.
- Post-Work Out Smoothie and Easy Strawberry Banana Smoothie for added protein.
- This dairy-free milk is perfect for your Superfood Green Detox Smoothie, also on this site, to complement your weekly breakfast meal plan.
Read on: High Protein Vegan Meals »
🥛 More alternative milks
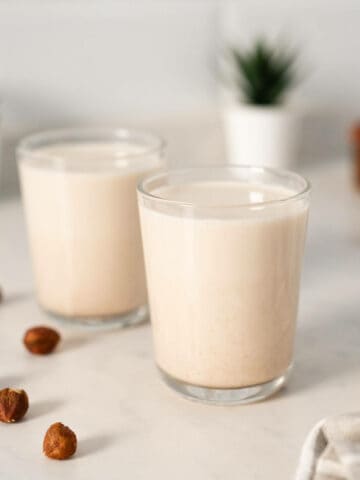
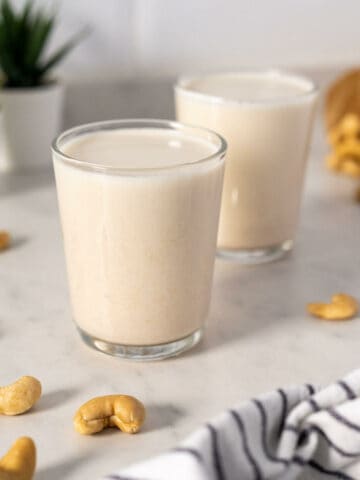
Make sure you also check these easy-to-make milk alternative Options: 5-minutes Almond Milk, homemade oat milk, cashew milk, hazelnut milk, walnut milk, and vegan buttermilk for cooking and baking.
All great dairy alternatives for lactose-intolerant people, those following a vegan diet, or who just don't want to deal with all the hormones or saturated fat present in cow's milk.
Interested in vegan protein sources? Read on high protein vegan meals.
🎥 Video
⭐ If you try this recipe, let us know! 💬 Leave a comment, rate it, and don't forget to tag us @ourplantbasedworld on Instagram. Cheers!
📋 Recipe
Making Organic Soy Milk in 6 Easy Steps
Equipment

Ingredients
- 1 cup soybeans dried, organic, nong-GMO
- 8 cups filtered water
Optional:
- ½ teaspoon sea salt avoid if following a WFPB diet
- ½ vanilla bean, or 1 teaspoon vanilla extract
- 6 Medjool dates pitted
Directions
- Soak the soybeans in water overnight for a minimum of 2 hours.
- Drain the soybeans (some people remove the outer skin, I have done it countless times and can’t notice any noticeable difference in texture. If you choose to do it, plan for additional 20 minutes).
- Blend the beans with 6 cups of water until well blended and any other additives you may have chosen (dates or vanilla).
- Strain the mixture using a cheesecloth or nut milk bag, or a fine-mesh strainer.
- Pour the mixture into a saucepan and add 2 cups of water. Bring to a boil, and immediately bring it down to low heat.
- Stir occasionally and skim foam (watch it close as it may go up, just as boiling cow’s milk would). It is essential to cook on low heat for about 15-20 minutes.
- Let it cool down. If there is any need to skim it again, do so before storing it in a sealed container in the fridge for about 3-4 days.
Video
Notes
- You can adjust the water quantity depending on how thick you want your soy milk.
Use yellow soybeans. - Boil on low heat; otherwise, you may notice some brown threads, which are nothing more than the remaining milk sticking to the bottom of your saucepan.
- You can use other sweeteners like agave syrup or maple syrup. Just add these liquid sweeteners after boiling your Soy Milk (or they can even be added directly in the bottle and shake. Another option is to blend the cooked milk again with the liquid sweeteners or add any sweetener at all).
- Add it little by little until the milk reaches your desired taste. The sea salt is optional; it simply helps to bring all the flavors together. Feel free to add other ingredients you might like, such as cinnamon or cocoa powder, at any point.
Nutrition Facts
Nutritional Disclaimer
The information shown is an estimate provided by an online nutrition calculator. It should not be considered a substitute for a professional nutritionist's advice. See our full Nutritional Disclosure here.
Affiliate Disclaimer
Please note that some of the links here are affiliate links, and I will earn a commission if you purchase through those links. I recommend all of the products listed because they are companies I have found helpful and trustworthy.

As the lead content writer and recipe developer at Our Plant-Based World, he combines his passion for health and sustainability with a Plant-Based Nutrition Certification to create accessible, delicious vegan recipes. His expertise in plant-based cooking supports the blog's mission of fostering a healthier, environmentally conscious lifestyle through simple and seasonal dishes. His commitment to making vegan cooking enjoyable and inclusive for everyone shines in each recipe and article.

Chelse
Super excited to try this out! What is a serving size? I don’t see it on your nutrition data. Thank you 🙏
Gus
Thanks for your message Chelsea; the serving size is next to Cuisine on the Recipe Information. The serving size is one cup, and the recipe yields 6 servings. Let us know how it goes! 🙂
Helen
I have never tried to make my own soy milk but you make it look super easy! I will have to give it a try.
Kris
This was so fun to make! Thank you! 🙂
Gus
You are welcome, Kris!
Anjali
This guide was so helpful!! I had no idea it was so easy to make soy milk at home!
Gus
I am glad you found the soy milk how-to guide helpful, Anjali! Thanks for your review!
Sara
Love soy milk with my morning coffee as well! This recipe is simple and easy to follow and I loved the addition of vanilla and dates to sweeten it a little.
Gus
Same here! We always have our morning coffee with soy milk! It makes a very creamy froth!
Sanjana
I am doing the recipe at the moment and I think it will turn out great! I just have a question: it says you should ferment soy for 6 hours if you are sensitive. How do I do that exactly?
Thank you so much for answering this! I only foumd recipes for Natto when I Tried to Google it
Gus
Hi Sanjana, I am very sorry about the confusion. I just edited the text. I meant, soaked not fermented. Soy should be soaked in water, for at least 6 hours... let us know how your soy milk turned out!
Colleen
We go through a lot of plant based milk as well, and yes it's expensive. And I always feel guilty every time we toss another tetra pack in the recycling. So this recipe is perfect. Thank you!
Gus
That's great Colleen, yes that's the same reason why we started making our own homemade soy milk! Our little grain of sand for the planet!
Amanda Wren-Grimwood
I didn't know this was possible at home. Looks simple to do and all from scratch, so much healthier too.
Gus
yep! Easy! I started looking into it, as I was concerned about the quality of store-bough soy milk, only to find out that it was very easy to make at home!
Maria San Juan
Wow! This is how easy it is?! I did not expect that!
Louise
You made the process so easy to follow! I'll never have to buy in soy milk again!
Gus
Thank you Luoise, I am glad you found it helpful!
Sonia
. hola ... yo lo hize salio muy bien me encanta ami a mi hijo .solo q hago cn la harina de la soya q quedo colada???? gravias x responder.
Gus
Hola Sonia, que bueno que te gustó y hayas quedado contenta con el resultado. La pulpa restante para hacer recetas como bolitas de chocolate o agregarlas en otras recetas como hamburguesas vegetales. Acá te dejo un post que tenemos sobre qué hacer con la pulpa de tus leches vegetales.
Saludos!
Anjali
Thank you so much for this helpful guide! I had no idea it was so easy to make your own soy milk at home - can't wait to try it soon!
Petro
This is so interesting, I didn't know you can make soy milk at home! I can't wait to give it a try! Thanks for sharing your idea!
Beth
What a great idea and such a fun recipe and to make with my daughter! So much better than store bought and we can’t wait to make this again!
Cathleen
Why have I never thought of making it at home before?? This is genius!! Bookmarking this to make later, thank you so much for the recipe 🙂
Alison
I also prefer soy milk in my coffee. It's so nice and creamy and froths up nicely too! This is such a great alternative to store bought, and so much healthier without all those added ingredients!
Biana
What a great idea! I didn't realize you can make soy milk yourself.
Gus
yeah! Is easy and super customizable! We love it!
Gio
Never realized how easy it was to make your own soy milk. I started making it now and I really like it. I added vanilla and maple syrup. Thanks. I am loving the blog. I am going to try out the Oats Milk too.